
Congratulations on the purchase of your new AverLAB! We know you’re excited to get started using it, and there are just a few steps needed to get you underway. Please be sure to follow the instructions below, and you’ll have a trouble-free start to using your new analyzer.
Included Items
When you open the AverLAB box, look carefully to find all of the items listed below. Some of them will be under the cardboard tray in the bottom of the box. Be sure to save the box and packing materials in case you need to ship or store the unit.
- The AverLAB unit
- The Getting Started card
- A 12V in-line power adapter and power cord for your country
- An Ethernet cable
Connections
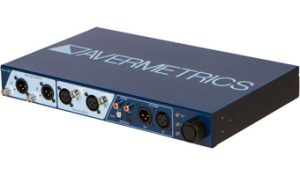
Connect the power adapter to the 12V DC input on the back of AverLAB. Be sure to only use the supplied power adapter, since other adapters could have incorrect polarity, or generate noise that might affect operation. Connect the AC power cord to the adapter and plug it into a grounded AC receptacle.
AverLAB communicates with your computer via wired Ethernet. Using the supplied Ethernet cable, or any standard Cat5e or better straight or crossover cable, connect the LAN port on AverLAB to your network.
Choose one of the following ways to connect AverLAB:
- Connect to a switch or hub that is connected to your network
- Connect directly to your router
- Connect directly to your computer, without a switch, router, or hub
By default, AverLAB is configured to use DHCP, which means it will attempt to get its network configuration from your router. When connected directly to your computer, AverLAB will use a protocol called AutoIP, which auto-assigns a compatible configuration. Your computer will do the same thing for the Ethernet port that is connected to AverLAB, and the two can communicate.
In order for AutoIP to work properly, however, your computer’s Ethernet port must be set to use DHCP. See the Troubleshooting section below for more information.
Installing AverLAB Software
Download the latest version of the AverLAB software for your operating system on the download page. Be sure to check back often to get the latest version–we’re continuously updating AverLAB to improve the program and add new features.
For Mac Users
Double-click on the file you downloaded and drag the AverLAB icon over to the Applications folder to install the program.
For Windows Users
Double-click on the file you downloaded to open the zip file. Double-click on the installer file inside the zip file to run the installer. Follow the on-screen instructions to install the software.
First Run
An End User License Agreement (EULA) is presented the first time the AverLAB software is run, and may also be found here. Please read and click Agree in order to continue to use the software. The limited warranty for the hardware may be found here.
If everything is setup correctly, the status bar at the upper left corner of the application window will show “AverLAB: Connected”. Depending on the version of firmware in the unit, the program may want to download new firmware into the onboard flash memory. Be sure to let it do so, since the unit’s firmware must match the version that the software expects in order to work properly.
User’s Guide
More detailed instructions on using AverLAB may be found in the AverLAB User’s Guide. This includes how to create projects and tests and how to connect to and use the AverLAB hardware.
Troubleshooting
More information on troubleshooting issues with AverLAB hardware and software, including installation, may be found on the Support page. Click on any of the topics under AverLAB Troubleshooting.